

HOW TO FIT THE GOLD NAILS
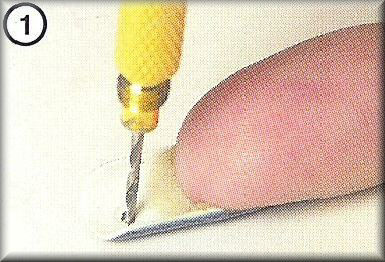
| Step 1 - Check that the gold nail roughly fits the form of the nail. If the nail is not long enough, one would usually first sculpture or do a tip overlay (fit a tip onto the natural nail using gel/acrylic/silk, .. etc). Check that the length of nail is suitable and make sure the gold nail does not touch the cuticle. Determine where to place the hole in the nail. Make sure the hole is not too close to the fingertip. Using the nail drill, make a hole through the nail. Knowing where to place the hole may take some practice in the beginning. Some technicians prefer to make a hole from the topside of the nail. |
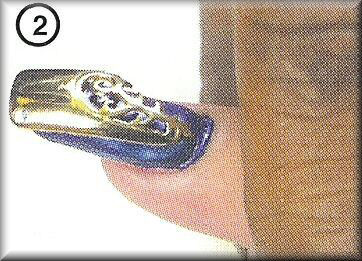
| Step 2 - Fit the gold nail in place. Using a soft cloth and pliers gently shape/form/mould the gold nail onto the form of the nail. Take special care not to scratch the gold nail. You want a reasonably tight fit so that the gold nail will not get caught on clothing or other items. At this point the gold nail should still appear to be loose. |
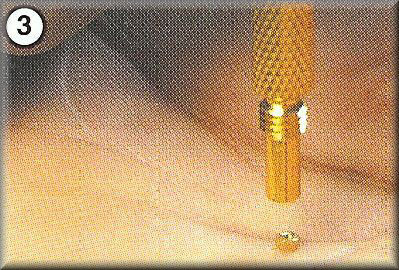
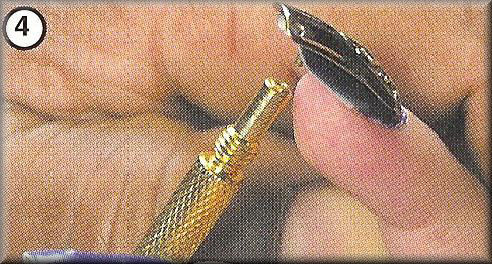
| Step 3 - Insert a nut into your nail drill. |
| Step 4 - Screw the nut on firmly. Ask your client to let you know if it feels too tight. The gold nail should fit tightly onto your clients nail. If necessary, use the cloth and pliers to do any final shaping. There should not be any rough edges. |
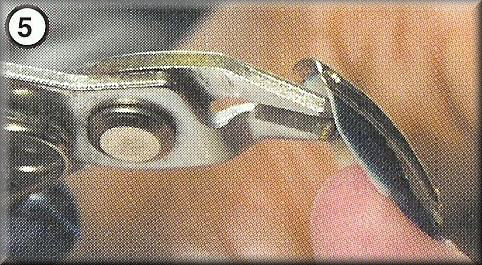
| Step 5 - Once you are happy with the fit, use the cutters to cut off the excess screw. Do not cut off too much and make sure some thread is still visible. When your client comes for a fill or a new set of nails, you will remove the gold nail and then you can just re-fit it. Just like other fine jewellery, this gold nail can be used over and over again. |
Send your order/enquiry to and we will get the relevant person to contact you.
For any other queries please contact Daniela on 082 469 4095 or
© 2004 Planet Nails Distribution